A Guide to Gallery CSS
Learn the basics of Gallery CSS with this easy-to-follow guide!
In this tutorial, we'll cover:
Adding Gallery CSS
First of all, some important facts about Gallery Skins:
- Only Premium Members are allowed to add CSS to their galleries
- Skins can be added to both the Gallery and the Favorites
- Skins can only be added to the Gallery folders and Favorites collections (shown in the sidebar) but not the main page itself
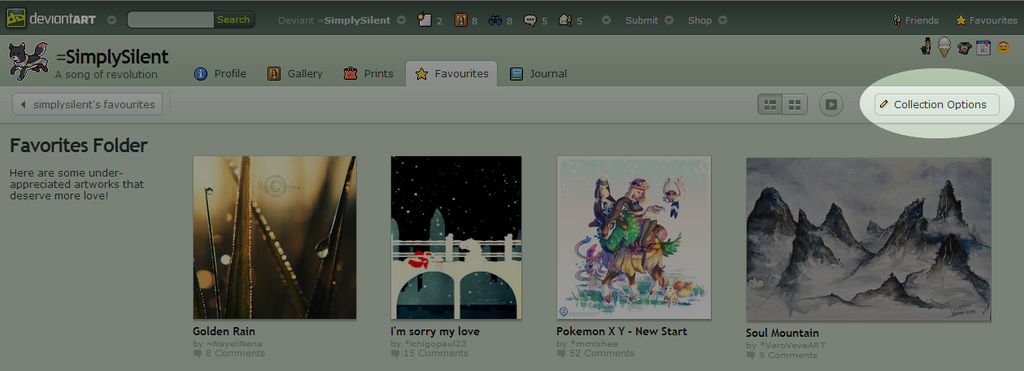
Step 1: Click on one of your Gallery or Favorites folders in the sidebar.

Step 2: Click the button called "Folder Options" or "Collection Options."
This button is located at the top right of the gallery.
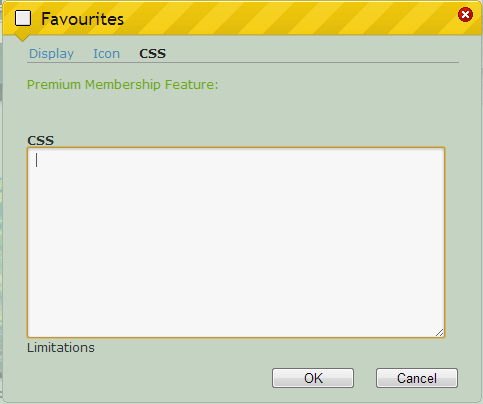
Step 3: Click on the blue "CSS" link at the top of the box.
Then click on the link called "Add CSS..." and then click the "OK" button on the pop-up box. You'll end up with a white text box like the one shown below.
Step 4: Paste your CSS into the box and click "OK" to save.
Your CSS will automatically be added to the folder.
Step 1: Understand the basic layout.
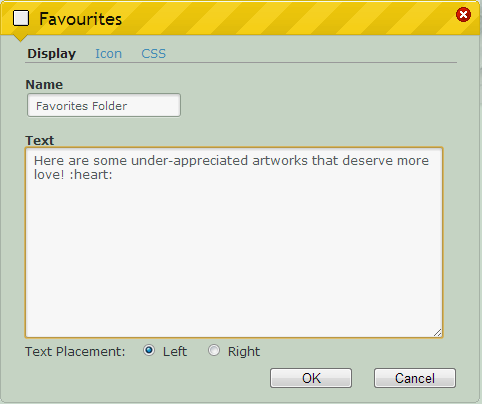
In this tutorial, we'll focus only on the three main parts of the gallery layout: the body, the folder title, and the description. Now don't worry, I promise that it'll be easier than you think! In the pop-up box that you get after you click "Folder Options" or "Collection Options," you are shown several options.
- Name: Folder Title
- Text: Description
- Text Placement: Where your description goes. See the images below to see how these two formats look:
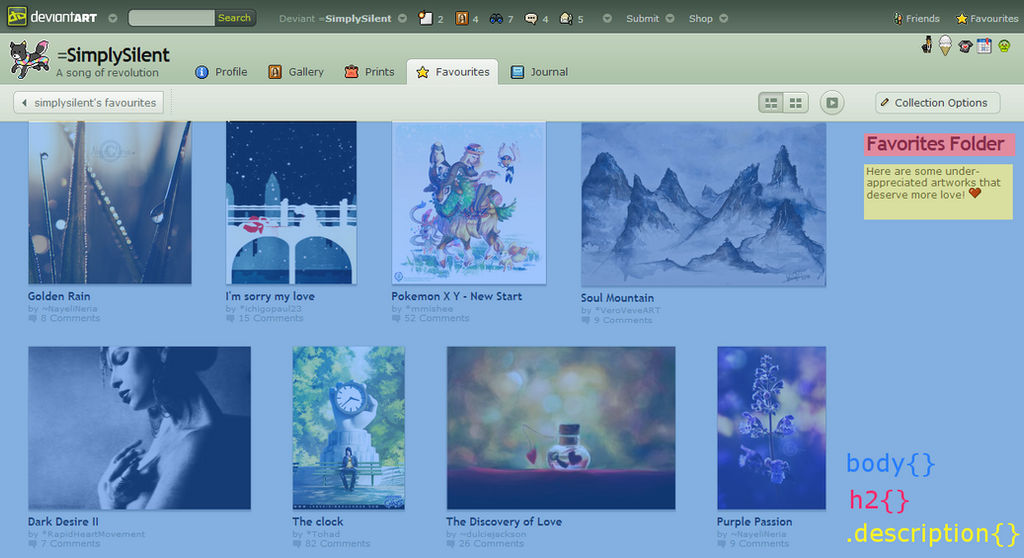
Here's what you get if you select "Left" for your text-placement:
Please note how I have color-coded the three different parts of a gallery layout.
- body (blue) covers the entire gallery folder
- h2 (pink) contains the folder title
- .description (yellow) contains the folder description
In this tutorial, we'll be working with the Left format, since that is the default option.
Step 2: Changing backgrounds and text colors
The first thing you'll probably want to do is change the colors of the backgrounds and text. Here's the basic format you can copy and edit:body{
For example, say I wanted a light gray background (#f1f1f1) for the body with a dark blue background for the folder title (h2) and description (#213457). I would type the following code into the CSS text box:
The result would look like this:
Notice how the formatting looks rather ugly in the preview above. There's a gap that I don't like above and to the left of the title, and the title is jammed right above to the image thumbs. The text of the title and description also look quite cramped, making them a bit difficult to read. But no worries, we'll fix those up nicely with margins and paddings!
In the paragraph above, I complained about the gaps around the title box (h2). Since that is outside of the box, we'll be dealing with margin. I want less of a gap at the top and the left, while I want more of a gap at the bottom. In CSS talk, this translates to:
margin-top: -15px;
margin-left: -15px;
margin-bottom: 30px;
or, if you are more experienced, you can condense the above into just one simple line  :
:
margin: -15px 0px 30px -15px;
Now, I also didn't like how the text looked cramped in the title and description. Since this is inside the box, we'll work with padding.
For the title (h2), I want a padding of 30px all around, while for the description, I want a padding of 20px all around. In CSS talk, this would be:
padding: 30px;
and
padding: 20px;
Since we added padding to the description, this makes it become too large and start to squeeze into the image thumbs. To fix this, I'll limit the size of the description to a smaller size of 160px by adding:
width: 160px;
Now we get this much prettier result:

Putting it all together, the code looks like this:
body{
background: #f1f1f1;}
h2{
background: #213457;
color: #fff;
margin: -15px 0px 30px -15px;
padding: 30px;}
.description{
background: #213457;
color: #fff;
padding: 20px;
width: 160px;}
background: #f1f1f1;}
h2{
background: #213457;
color: #fff;
margin: -15px 0px 30px -15px;
padding: 30px;}
.description{
background: #213457;
color: #fff;
padding: 20px;
width: 160px;}
Step 4: Experiment!
For those who are more experienced with CSS, here are just a few of many elements you can use:
- .folderview-art {} contains all the image thumbs
- .tt-w {} contains the thumb, title, comments, and artist
- .thumb {} formats the image thumbs
- .details {} contains the title, comments, and artist
- .details .t {} formats the thumb title
- .details .u {} formats the artist
- .commentcount {} formats comments
Adding Background Images:
If you prefer patterns or textures instead of solid blocks of color, then you can add background images with this code:
background: url('INSERT IMAGE LINK HERE');
For those with more experience with CSS, you can also work with background color, background repeat, and background position. You can combine all these into one line like so:
background: #color url('INSERT IMAGE LINK HERE') no-repeat top;
To learn about all of the different options you can use, I suggest reading about backgrounds on www.w3schools.com
Some Useful Resources
Tutorials/Layouts:
- How to download and use gallery skins: How to Use Gallery Skins by xXSnowDreamXx
- Some useful basics for understanding CSS: PE: The Gate to CSS by PizzaPotatoNBacon
- Some more elements you can use: DeviantART Gallery CSS Explanation by toonham
- An installable code snippet resource for styling thumbs: Multi Thumbstyles CSS Template by gillianivyart
- A walkthrough of coding a gallery skin: Walkthrough Gallery Template by GinkgoWerkstatt
Gallery Skins:
Browse through Gallery Skins on deviantART.
Groups:


